This guide will walk you through the steps to download, install, and configure PyCharm for your Selenium projects.
Why PyCharm?
PyCharm is a powerful Integrated Development Environment (IDE) specifically designed for Python development. It offers various features such as intelligent code completion, on-the-fly error checking, and built-in tools for debugging and testing.
PyCharm is especially beneficial for beginners in programming who prefer a streamlined experience over dealing with numerous extensions found in general-purpose editors catering to multiple languages. If you’re already comfortable using another editor, feel free to skip this guide.
Step-by-Step Installation Guide
Step 1: Download PyCharm
- Go to the Official Website: Open your web browser and navigate to the JetBrains PyCharm download page.
- Choose Your Version: You will see two editions available. At the top you will find PyCharm Professional, scroll down a bit to find PyCharm Community Edition.
- PyCharm Professional: This version is paid and includes additional features for web development and advanced tools.
- PyCharm Community Edition: This version is free and open-source, ideal for beginners and educational purposes.
For most beginners, the Community edition is sufficient.
We will be using PyCharm Community Edition for our tutorials. - Download Installer: Click the download button for your operating system (Windows, macOS, or Linux). The Windows 64 installer is around 460 MB.
Step 2: Install PyCharm
- Run the Installer: Locate the downloaded installer file and double-click it to run.
- Setup Wizard: Follow the instructions in the setup wizard.
Click `Next`.
- Choose the installation path. (Keep the installation path as default unless you have some project choices.)
- Optionally, check the boxes to create a desktop shortcut and associate
.pyfiles with PyCharm. We recommend checking all boxes.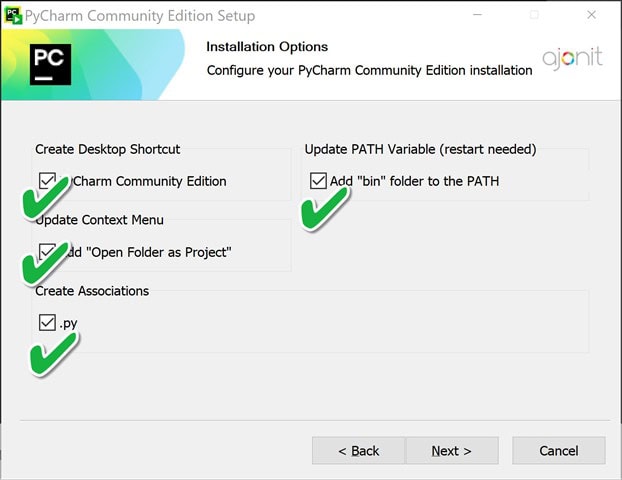
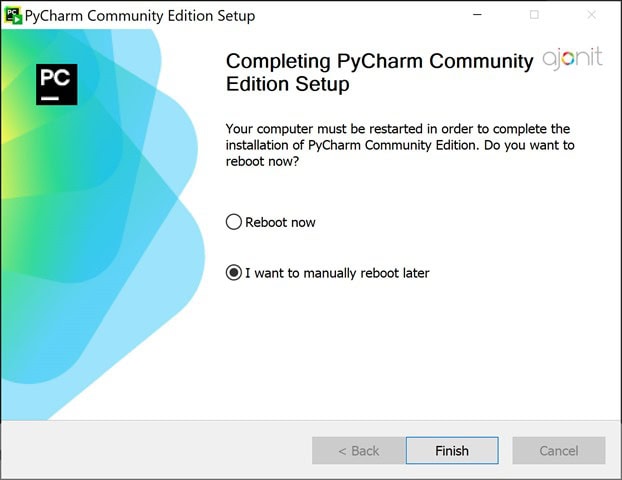
- Finish: You would need to Reboot the system to complete the installation. Click “Finish” to exit the setup wizard.
Step 3: Initial Configuration
- First Launch: Double click the desktop shortcut to launch PyCharm for the first time.

- Setup Wizard: You will be prompted with a setup wizard. Go through the usual process.
- UI Theme: On the left, go to `Customize` tab. Choose a UI theme (Dark or Light) based on your preference or simply check `Sync with OS`.
Step 4: Configure Python Interpreter
- Open a Project: Start a new project or open an existing one.
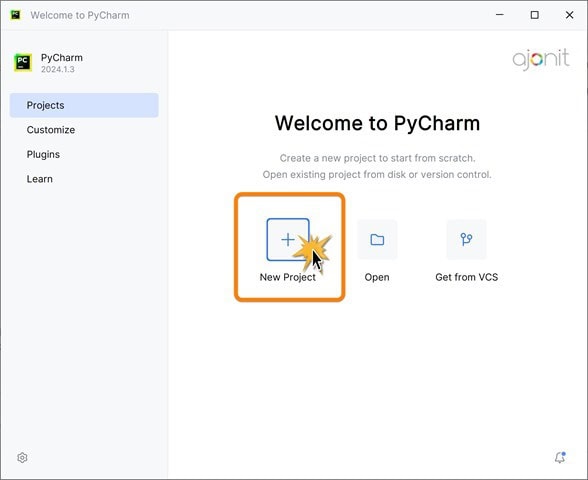
- Project Location: Choose a project location on your file system.
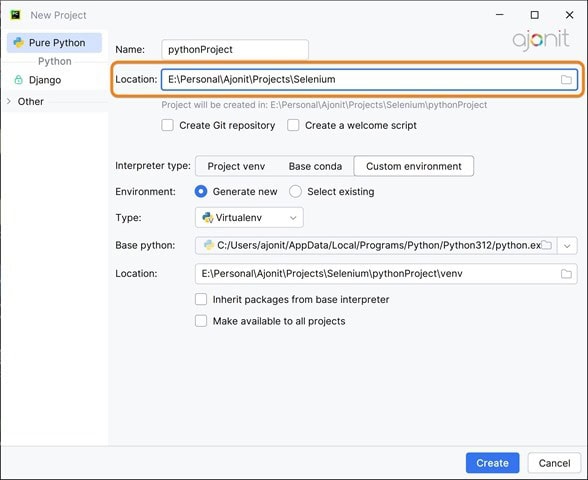
- Python Interpreter: Ensure you select the
System interpreter. Check a quick illustration below.
You’re all set to start testing with Selenium!
